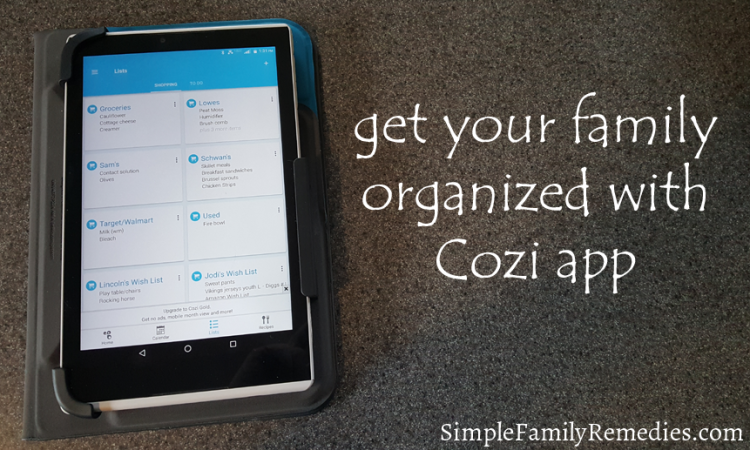
get your family organized with Cozi app

cozi.png

I am a tech geek. I love devices and apps! Several years ago, an ad appeared in my Facebook news feed for Cozi; I had never heard of it before. I was intrigued, so I decided to investigate. It was a free download, so I figured, why not? I downloaded it, played with it a bit, and have loved it ever since!

Cozi is a calendar, to-do lists, shopping lists, a journal, and MORE – all in one app. Those features, though, aren’t even the best part! The best part is you can create an account and invite your family members using a shared password (and their own email address to log in). That way, when each of us logs in, we see the SAME stuff. We can assign lists and calendar events to people individually, and we can even create profiles for the kids and the pets!

Your daughter has a soccer game Saturday at noon? Put it on the calendar and assign it to her, to her and one parent, or to her and the whole family (or any combination of family members). When one member adds an event to the calendar, it automatically syncs for everyone else.

As you can see in the picture above, we have several shopping lists for groceries, Target, wish lists, and more. Almost out of milk? Add it to the list, and when your partner stops at the store on their way home from work, they’ll see it!

We just LOVE Cozi. I can’t imagine not having it now. I can’t imagine going to the grocery store with a piece of paper for a list. I can’t imagine relying on that wall calendar to keep track of events. (What happens when you need to look at it and you’re not home?) I can’t imagine toting a planner around with me. And even if I did, how would my husband know what’s on it?

Cozi is available in both the Android and Apple stores. Check it out today!

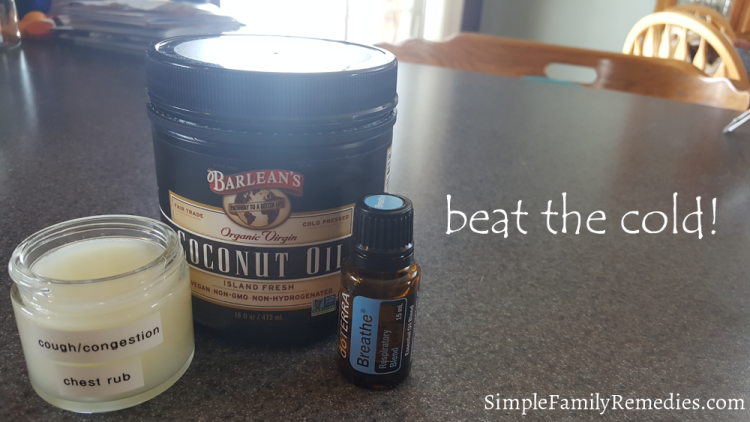
beat the cold!

coldremedies

For the first year of our son’s life, he wasn’t in daycare at all. When he was about one, though, he started to going to daycare four days a week for a total of about 20 hours a week. He loved being there, playing with the other kids and experiencing new things like painting, sensory development, and a sand box! Unfortunately, though, within his first few days, he picked up a cold that would go on to last for four months. While we understood the importance of exposing him to these things to build his immune system, we also struggled with the symptoms. At his age, medicines to curb the symptoms of course weren’t an option.

Then I got into essential oils, and I learned about the value of high-quality, therapeutic-grade oils. I haven’t looked back since! When he woke up on a Thursday with a runny nose and shared it with me by Thursday night, we began our all-natural treatment. I’m happy to report I was symptom free in 4 days, and he kicked it in just 5! For a kid his age, that’s fantastic! (Our pediatrician told us kids his age usually need 10-14 days to clear a virus.) Here’s our treatment plan:

  • For adults and older kids, I recommend using the Neti pot 2-3 times per day when you have cold symptoms. Read about it here.
  • For  babies and toddlers, get rid of that snot with the NoseFrida! It’s much more effective than the bulb syringe.
  • For everyone, diffuse the essential oils Breathe and lavender. The Breathe proprietary blend promotes clear airways and easy breathing. Lavender is often considered the multi-purpose oil, as it has countless benefits. One of those benefits for the common cold is its ability to help loosen phlegm and mucus.
  • Also great for everyone, apply a cough and congestion chest rub to help open the airways and breathe better. It can be applied as often as needed to the chest and neck. Get the recipe here.
  • Finally, don’t forget all the things your grandma said about getting rid of the cold: rest, drink plenty of clear fluids, and eat a healthy diet.

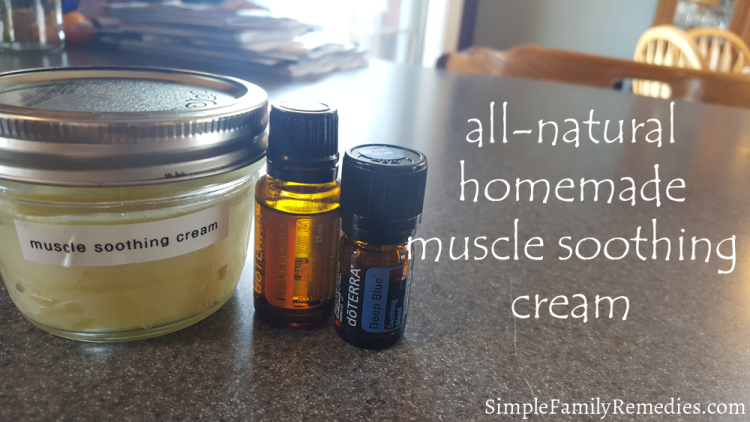
all-natural, homemade muscle soothing cream

musclecream.png

I have something called de Quervain’s tenosynovitis, also known as mommy’s thumb. It’s often referred to as mommy’s thumb because it’s common among (new) moms especially. Essentially, the tendons from the thumb through the wrist become inflamed, resulting in anything from mild discomfort to severe pain on the thumb side of the wrist. Why mommy’s thumb? When new moms continually pick up their kids (especially the older, heavier ones), excessive wear occurs on that tendon. Unfortunately for me and many others, we don’t always pick up correctly, and that causes this inflammation.

The best way to treat it is to work on lifting not with the wrists but with the legs. Sounds simple enough, right? It is – when you consciously think about it. If you’re like me, though (and especially if you’re short like me!), you forget, and reaching down into the crib to pick up your toddler makes it difficult to lift with your legs.

In any case, I’ve developed this tendinitis. I’ve worked quite a bit with my chiropractor, and that has definitely helped, so I highly recommend it! I also put together this cream that you can rub into the area (works great for any aches or pains) to help ease the pain. doTERRA’s Deep Blue and frankincense are wonderful anti-inflammatory oils. Additionally, frankincense has a warming effect while Deep Blue has a cooling effect (think Icy Hot!). Just rub the cream into the affected areas as needed throughout the day. Click the ingredients

Ingredients:

Make It:

  1. Melt olive oil, coconut oil, and beeswax in microwave, approx. 2 minutes. (I like to use glass Pyrex measuring cups; that way I can easily pour into jars for storage.)
  2. Whisk in essential oils.
  3. Pour into wide-mouth pint jar.
  4. Allow to cool fully before capping. (Cream will set as it cools.)
  5. Store in a cool, dry place.

Cost Comparison:

  • This recipe = 94 cents per ounce
  • Icy Hot at Walmart = $1.65 per ounce

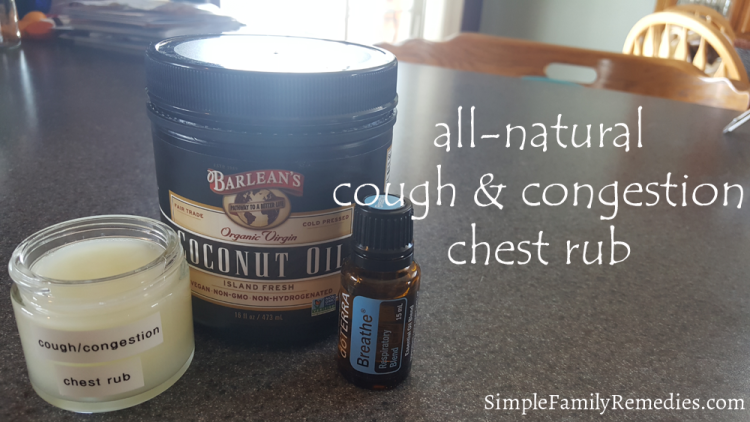
all-natural, homemade cough & congestion chest rub

coughcongestionrub.png

Have you ever read the ingredients on the Vaporub jar? I used to use that stuff all the time, and I always felt like it really cleared my nasal passages and chest congestion. When I started making my own health remedies, this was definitely one I wanted to try! This recipe uses one of doTERRA’s proprietary blends, Breathe, which contains the essential oils Laurel Leaf, Peppermint, Eucalyptus, Melaleuca, Lemon, Cardamom, Ravintsara, and Ravensara. This recipe is safe for babies, kids, and adults! You’ll need two 2-ounce glass jars or steel tins (or one 4-ounce jar) for storage. Not sure where to get one? Check here.

Ingredients:

Make It:

  1. Put coconut oil and beeswax into a glass pitcher (I like to use the Pyrex glass measuring pitchers because I can measure right in them, microwave in them, and pour easily from them!).
  2. Heat in microwave until melted, approx. 2-2.5 minutes.
  3. Add essential oils, and mix well (a whisk works best).
  4. Pour into a glass jars for storage.
  5. Allow to cool before capping.

Apply to chest as needed to alleviate cough and congestion.

Cost Comparison:

  • This recipe = $1.65 per ounce
  • Vaporub at Walmart = $2.83 per ounce

All-natural, All-purpose Cleaner

Household cleaners are expensive and full of chemicals and harsh, artificial ingredients. This simple recipe is a great cleaner for all surfaces from your kitchen to your bathroom! And, it’s easy to make and inexpensive!

Ingredients:

Make It:

  1. Add water, borax, and washing soda to a small saucepan.
  2. Whisk over heat until borax and washing soda dissolve completely.
  3. Remove from heat, and allow to cool slightly.
  4. Gently whisk in castile soap and essential oils.
  5. Pour into glass bottle.

That’s it! Simply spray it on the surface to be cleaned, and wipe clean with a warm, damp rag. For stickier, messier messes, allow to sit for a few minutes before wiping.

homemade baby food storage

foodstorage.png

As your little one gets older, freezing your homemade purees in ice cube-sized portions certainly won’t be big enough. At one point, I was taking 3-5 cubes out a time for feeding when I finally realized I needed to freeze in larger portions! We found two great options.

Gerber Graduates Bunch-a-Bowls

Once you’ve made your puree, lay out a few of these bowls, and fill them to your desired serving size. Then place the bowls on a cookie sheet, and pop them in the freezer until they set. Once they set, you can pop the portions out of the bowls and into freezer storage bags. Remember to label your bags with contents and date. Purees can be stored in a non-frost-free freezer for up to three months.

Get Bunch-a-Bowls here.

Reusable Pouches

You know how you can buy all sorts of pre-made purees in those cute little pouches at the store? The good news is you can buy reusable pouches and fill them yourself! There are lots of brands out there, but I like Nature’s Little Squeeze. The bottom unzips, so just pour in your puree, and zip them shut! They have a double zipper to keep them from leaking and to create a great seal in the freezer. Be careful not to fill them too full, or you’ll have some coming out when you try to zip it shut. They have a fill line, but I found it better to stay about a quarter inch below the line. I like to store the full pouches in a freezer storage bag too, so I can label the bag. As your little one gets older, they can even eat right from the pouch. They’re great for any type of pureed food – smoothies, applesauce, you name it! When they’re empty, simply wash them out (dishwasher safe!), let them dry, and use them again. Lost a cap? All the caps from the store-bought pouches will fit as a replacement.

Get Nature’s Little Squeeze pouches here.

Making homemade foods was so great for us! Baby food is crazy expensive at the store. While it’s convenient and great in a pinch, I didn’t want it to be our only option. Making our own at home was easy and inexpensive, and it allowed me to completely control what our little one was eating.

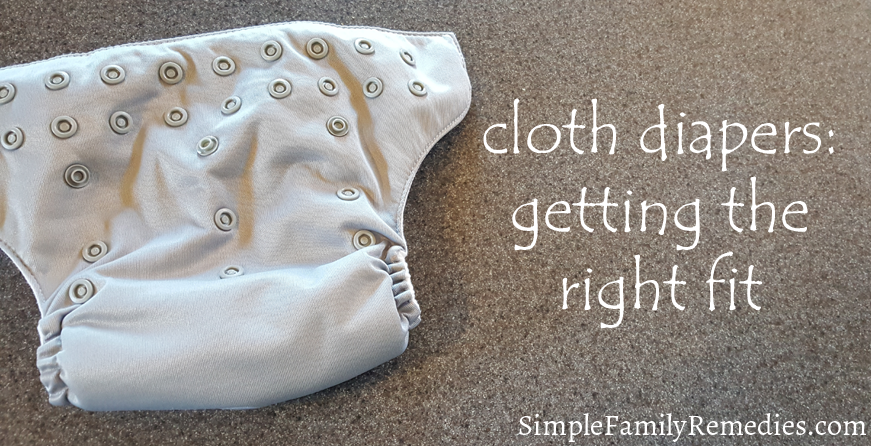
cloth diapers: getting the right fit

fittingdiaper.png

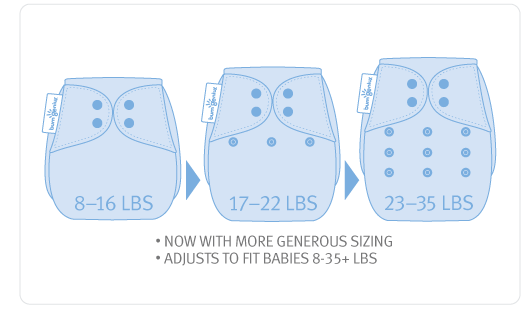
One of the biggest problems we had when we started using cloth diapers was finding the right fit. The diapers are adjustable for babies and toddlers 8-35 pounds by sizing them small, medium, or large. Small is recommended for 8-16 pounds, medium is 17-22 pounds, and large is 23+ pounds. That’s a great starting point, but we found it’s not perfect. For example, if your baby has thinner legs or a smaller waist, you may need to go down a size. Likewise, if your baby has chubby legs or a larger waist, you’ll probably have to go up a size. And, what fits one week may not fit the next, so you have to adjust as needed.

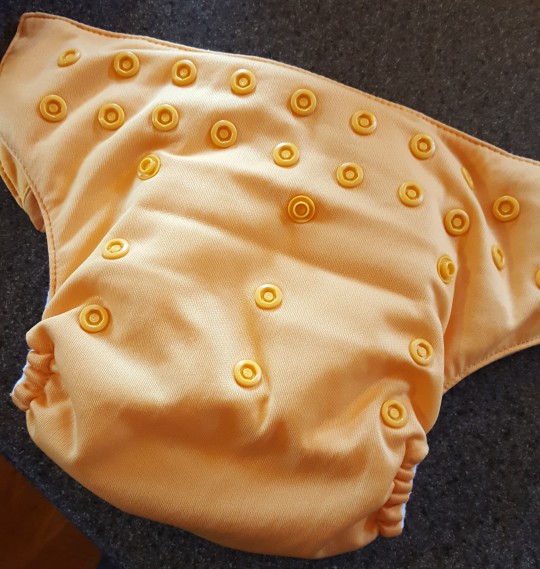
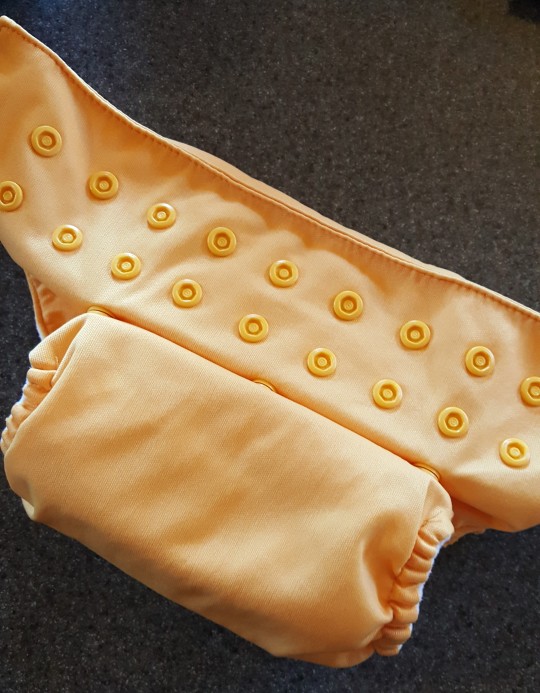
Simply snap up from the bottom to make the diaper smaller, and unsnap to make it larger. The photos below show a diaper sized at large and then at small.

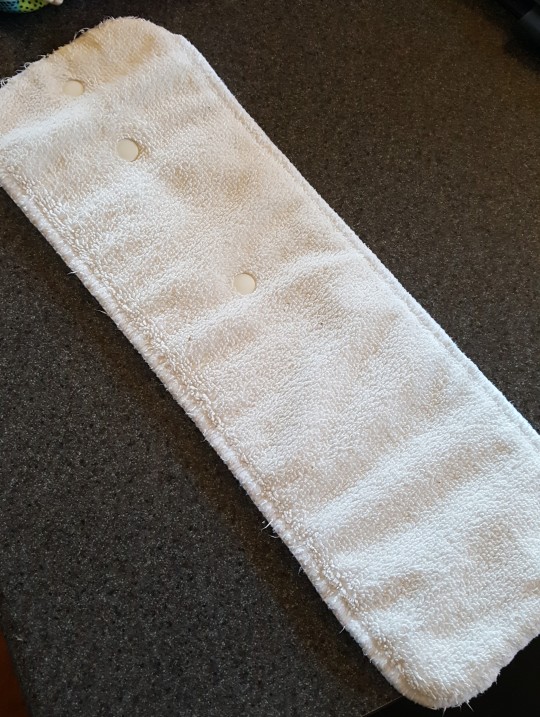
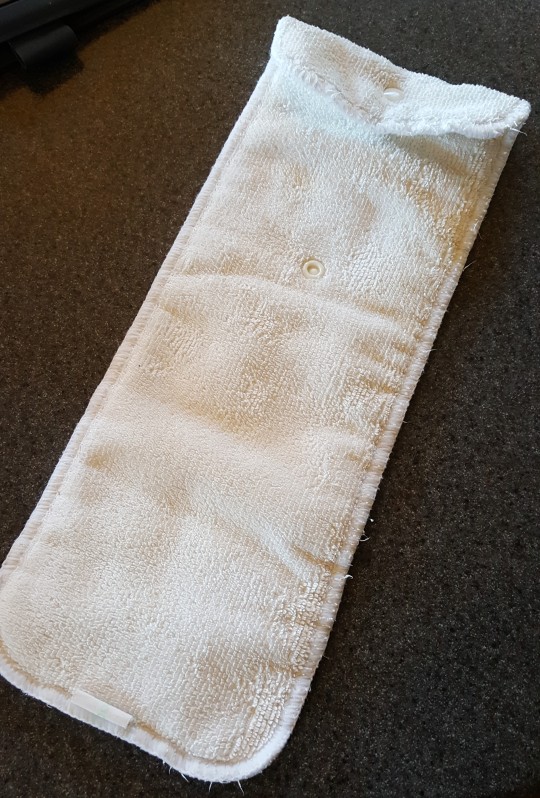
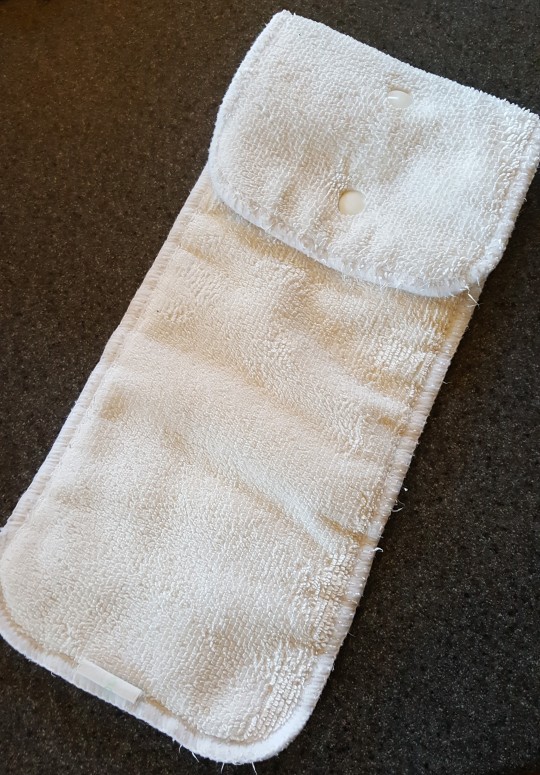
If you’re using the pocket-style diapers, then you’ll also need to size the inserts. You’ll notice they have snaps for that. Leave it fully open and unsnapped for size large. Snap down one for medium, and snap down two for small. See the photos below.

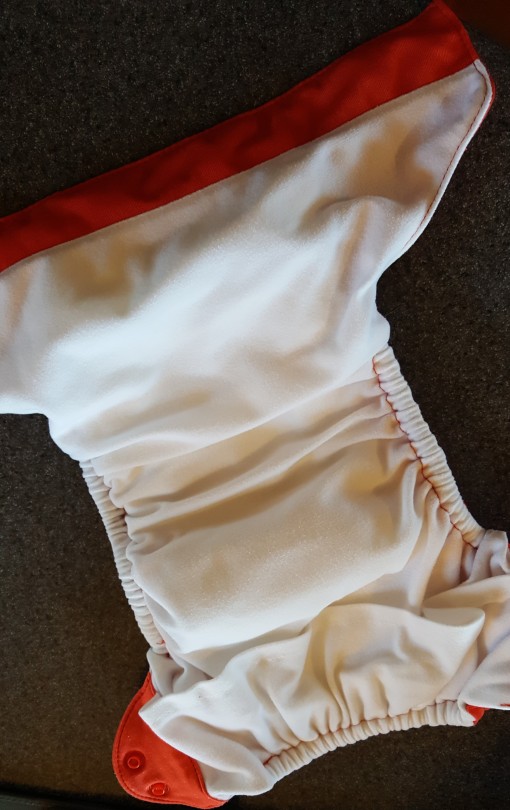
How you stuff the insert into the diaper shell is really up to you. Since we have a boy, we put the folded part in the front. For girls, I would put the folded part in the back. Additionally, you want the waist of the diaper to sit as flat against the baby’s stomach as possible (that’s one of the reasons I prefer the all-in-one style; it does it naturally). With the pocket style, due to the nature of its design, the insert can cause some bulk. You want the insert to NOT go passed the white part of the diaper so the waist of the shell (the colored part) can lay flat against the skin. In the photo below, you would want to stuff the insert without pushing it up into the red portion (top of photo) of the diaper shell.

I’ve always said it would be nice if they had just sewn that shut so you couldn’t actually push it all the way to the top.

Finally, it’s important to consider HOW you put it on. That might seem silly, but there really is a right and wrong way to put them on. Disposable diapers are pretty forgiving for the most part. As long as you get it on the baby and velcro it, you’ll probably be ok. For cloth, unfortunately that’s not the case. You want to get the leg opening elastic into the crevice of the leg/groin area as snugly as possible. You also want the back part of the waist to come up and over the front part before you snap it shut. That helps to create a good, snug fit that will resist leaks. I found this YouTube video VERY helpful: https://goo.gl/cJRJwx

If you are having issues with leaking, check out this post for more tips.

5 simple remedies for your personal finances

Finances are tricky, but with a few simple tips, you can get a better hold on them!

#1: Track Your Spending

Sounds simple enough, right? That’s because it is! So very few people actually do this initial step, and it’s a recipe for a rough financial life. I help friends with finances all the time, and when I ask how much they spend in various categories, they almost never know! Do this single simple task for me for just one month. Track any money that goes in or out of your life. EVERY. SINGLE. PENNY. I mean it; it’s really not complicated. Use a notepad or your phone to track it. My personal finances are more or less 100% digital, so I just log into my bank website and then transfer that data to an Excel sheet to see it all laid out. Feel free to use websites like Mint to do the work for you; just make sure you actually do it!

I put people through this exercise for two major reasons. First, you need a baseline to establish your spending habits. How can you budget or plan for any purchases if you don’t know how much money comes in or out of your life? The second reason is to send a wake-up message. Most people who do this are floored at not only how much they spend on things but on what they actually spend it. I’ve seen friends save over $300/month by just doing this and shoring up any cracks they had that were just seeping cash right from their wallets!

#2: Make a Budget

The tried and true method to all financial advice is to make a budget. It’s a broken record and for good reason. IT WORKS! I don’t want to hear any sort of complaints about how much time it takes, or you don’t know how, or you are bad at math so you can’t make one. Frankly, those excuses are just that – excuses. You can always adjust the budget as time goes on and your life situation changes.

The world of financial nerds has done you a major favor by creating tools like Mint, Personal Capital, or YNAB (You Need A Budget). I personally use the first two as well as a spreadsheet I’ve crafted over the years to pinpoint any and all money in/out of my life. The best part of all – it doesn’t take any time at all. Websites like Mint look at your bank account (read only access so it’s secure!) and track and categorize anything that moves through it. You can setup a budget range on each category, and it will email you if you’re too close for comfort or over. At the end of the month, you can look at nice graphs to show you the data to understand trends and (best of all) which categories are weighing you down.

The bottom line is you need a budget. No ifs, ands, or buts about it. GET. IT. DONE.

#3: Stop the Debt

Debt is a tough subject for many people. Gurus like Dave Ramsey say it’s evil and will destroy your life while others like Robert Kiyosaki will encourage you to utilize it to build your wealth. There are many kinds of debt, but for the most part, debt is never a good thing. The worst type I want to hit is personal debt like credit card debt, car loans, or the worst…payday loans. Debt is a warrant out for your financial arrest. It is an EMERGENCY. Your head is on fire, and it should be treated as such. If you do have large amounts of debt, read a book like Dave Ramsey’s The Total Money Makeover. It’s not gospel by any means, but that man has helped a lot of people get out of debt. I personally not his biggest fan, but I’d be remiss if I didn’t acknowledge what he has done for consumers in debt.

Now how to fix your debt problem? Easy – STOP BUYING THINGS YOU CAN’T AFFORD! By definition, financing is using someone else’s money to get something for yourself. This means you yourself CANNOT AFFORD IT! If you can’t afford it, DON’T BUY IT! Moreover, if you have consumer debt, you should stop buying EVERYTHING outside of things to keep your body alive and your house habitable. That means no more Amazon Prime, Netflix, cable, gym memberships, trips to the store, or coffee breaks at Starbucks. It’s not forever – only until your debt is gone. I promise! Debt is an emergency; I’ll say it until you get it. Every single penny should be thrown at your debt until it’s gone. When one payment is finished, roll every penny from that payment and again anything extra into the next until it’s gone and you’re debt free. It’s been dubbed the “Debt Snowball” as it gains momentum as each debt is knocked out.

#4: Build an Emergency Fund

If you don’t have an emergency fund, you need to get one. Most recommend between 3-6 months’ worth of expenses held in cash or cash equivalents (like a money market account) that is easily accessible for such an issue. If your expenses add up to $2,000/month, you should have somewhere in the neighborhood of $6,000-$12,000 saved in cash based on conventional wisdom. This is really personal preference as I know some folks who have 3 months and others who have more than 12. If a large fund helps them sleep at night and they are okay sacrificing some financial return for peace of mind, it’s a trade worth considering.

I personally operate with multiple. I have a small $1,500 fund for emergencies like a car breakdown or appliance repair and 3 months’ worth of expenses for an unforeseen layoff from work or other personal disaster.

#5: Invest in the Market

Investing scares far too many people, but it’s really not as complicated as the “experts” will lead you to believe. You could read a handful of books and pull down better returns than 95% of Wall Street. In case you don’t believe me, I’ll elaborate. Fidelity did a study a while back of all their investors and compared their returns to see who was performing the best and what they invested in. Who came out on top? It wasn’t a hedge fund manager or an investment firm; it was the investors that were DEAD. You read that right – those that had passed away had better returns than those actively participating in the market because they weren’t actively trading and let their money sit.

Now bare with me while I get into the nitty gritty here (of skip ahead if you’re not interested). Investment managers have one goal – to make money. With that comes the need to keep their clients happy by making them money. Investment managers buy and sell stock on a daily basis in an attempt to get their funds to produce higher returns. The problem is they often buy at inopportune times and charge fees to manage the fund itself costing you even more money. The market on average has historically returned around 7.75% depending on who you ask, so I’ll keep this general. Investment managers on average pull down about 5.75% (or worse) due to the amount of trading and “market timing.” You’d be better off investing in an index fund that tracks the market than going with an investment firm. Not only do they earn you less money but they charge you a portion of your assets for the privilege!

My advice? Go to a site like Vanguard and open an account; it’s free. They have many of the lowest fee-charging funds in the country and perform better than most advisers ever will. I personally put a large amount of my net worth into the index fund VTSAX. It’s a fund that tracks the US S&P 500. The fund itself literally owns a portion of every company in the index. The fund also charges an incredibly low fee of .05% vs. many fund managers that charge over 1%. It may seem trivial, but that amount compounded over your working years up to retirement adds up to hundreds of thousands of dollars. It’s highway robbery!

Bottom line…make a few simple fixes, and you’ll be on your way to financial freedom!

*Note: I’m not a licensed financial adviser, and you should take this advice accordingly. These are my thoughts and my personal practices and cannot be guaranteed. Read a book, and you can do this on your own too!
apple pumpkin dog treats (grain free)

applepumpkintreats.png

If you’re anything like us, your dogs are your kids, and you want to give them the best. While you can absolutely find some great store-bought treats, sometimes it’s nice to make them yourself. By making them, you can control the ingredients, and they tend to be cheaper!

Many of my homemade dog treats include coconut oil and turmeric. Coconut oil is fantastic for dogs on so many levels. It’s great for the skin and coat, which means it helps alleviate dry skin, shedding, and cracked pads. It’s also great for the hips and joints, helping to lubricate joints and ultimately making movement a bit easier. Turmeric is an optional ingredient, but I always include it because it also is great for the skin, coat, hips, and joints.

Ingredients:

  • 1/2 cup pumpkin puree (or mashed cooked sweet potato)
  • 2 eggs
  • 1/4 cup unsweetened applesauce
  • 1/4 cup coconut oil
  • 1/2 tsp ground turmeric (optional)
  • 6 tbsp coconut flour
  • Pinch sea salt

Make Them:

  1. Preheat oven to 350 degrees.
  2. Line baking sheet with parchment paper.
  3. Melt coconut oil in the microwave, approx. 1.5 minutes.
  4. Add pumpkin, eggs, applesauce, coconut oil, and turmeric to a food processor and mix.
  5. Gradually add coconut flour to the processor and mix.
  6. Transfer mixture to papered pan, and spread out to approx. 1/4 inch thickness (I just use my hands for this). Try to keep the edges as smooth as possible.
  7. Sprinkle with sea salt.
  8. Bake in preheated oven for 20 minutes.
  9. Remove pan from oven, and cut into bite-size pieces using a pizza cutter.
  10. Return pan to oven and bake an additional 18-20 minutes, or until edges begin to brown slightly.
  11. Allow to cool on the pan before transferring to a storage container.
  12. Store in an airtight container (for extra shelf life, store in the refrigerator).

happy tot roller

happytotroller.png

Feeling anxious, stressed, uptight, or just a bit down? This essential oil roller has a wonderful calming, uplifting effect. I use it whenever my toddler gets a bit unruly! Lavender essential oil is a great natural remedy for, among countless other things, anxiety and stress. Wild orange also eases anxiety as well as sadness and nausea. Make this simple roller, and you have a perfect, natural solution to your anxiety, stress, and sadness. You’ll need a 10-mL roller bottle (any color or clear). Not sure where to get one? Check here.

Ingredients:

Make It:

  1. Add essential oils to roller bottle.
  2. Fill with fractionated coconut oil.
  3. Cap and shake to mix oils.

Apply as needed to the chest. This roller can be used on all ages!